|
9-13-01
Build a voice-activated grocery list with REALbasic by
Erick Tejkowsi
This week we'll build a simple grocery list application that you can talk to.
While surveying the contents of the refrigerator,
tell your Mac what you need to buy at the store. It hears you and adds the item to the list.
The Mac OS includes a nifty piece of speech recognition software. It's not the most accurate recognition
around, but it works well enough for fun projects like this and comes stock on the Mac OS CD.
Plus, it always makes Windows users jealous (and that's a good thing).
Preparation
Before we get started, there is a bit of preparation you need to do.
Got everything? Good. Let's build the interface.
Build and Code
Launch REALbasic and drag the resource file you just downloaded (named "Resources") into the project. This file contains
an 'aete' resource, which permits your application to receive Apple Events. In other words, this project
will be AppleScript-aware. This particular 'aete' resource adds one command to our application:
AddText
If you'd like to learn how to build your own 'aete' resource or add your own scriptable commands to this resource file, be sure
to read this REALbasic Monthly tutorial.
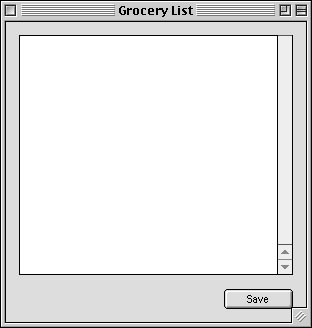
Next, from the Project Window open Window1 by double clicking it. Drag a Listbox and a PushButton to the interface.
It might look something like this:
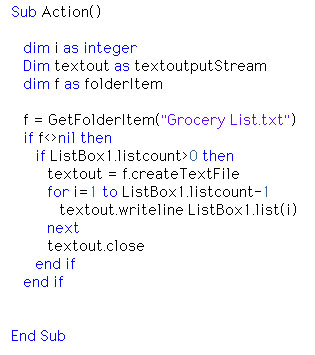
Double click the PushButton to open the Code Editor and add this code to its Action event.
It saves each item from the grocery list to a text file in the same folder as the grocery list application.
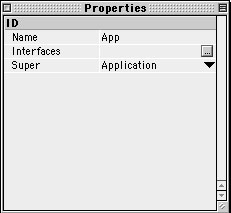
Close Window1 and create a new Class by selecting File->New Class. Name the class: App, and assign it as an Application subclass.
The application subclass is where we will catch all incoming AppleScript commands.
From the Project Window, open the App Class and navigate to the HandleAppleEvent event. Add the following code:
When your program receives an Apple Event from somewhere (typically an AppleScript), that Apple Event has a EventClass and an EventID.
For this example, all you need to consider is the Event ID. If you open the Resources, you will find that the "AddText" command is mapped
to a four digit code : "DISP" (short for 'display'). That code is the EventID. So, our application sits around minding its business, when suddenly
along comes an Apple Event. If it has an EventID equal to "DISP", we will handle it. Next, we get the text that this EVent is passing to our application
and place it in the variable txt. Finally, we add that text to the list and return TRUE, allowing the AppleEvent to be handled.
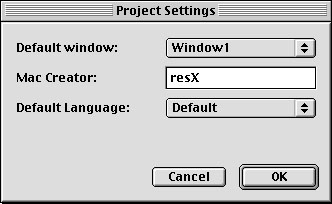
The final step before building this application is to set our application's creator code. Select Edit->Project Settings, and change the code to 'resX'.
This uniquely identifies our application and is an essential step for the AppleScript feature to work properly. AppleScript needs to know which
application to send messages to, and this four digit code is how we do that.
Ok, that's it! Well, almost. Go ahead and build the project, naming it "Grocery Listener". Once you've built it, launch it. As you can see,
not much happens. This is because we must use an AppleScript to add data to the grocery list.
Send in the Scripts!
Launch Apple's Script Editor and create a simple script like this:
tell application "Grocery Listener"
activate
set x to "Carrots"
AddText x
end tell
Run the script, and if everything is working okay, the item "Carrots" should be added to your grocery list.
Once you have it working,
save the script as a Classic Applet. Finally, take this built script and place it in
the "Speakable Items" folder (you can find it in the Apple menu). Fire up Speakable Items from the Speech control panel
and you are on your way to a speech recognition grocery list.
Conclusion
Obviously this example is rudimentary and could be accomplished with a similar AppleScript and some word processor.
The point is that you can use speech recognition in your application to perform some amazing tricks.
Use this tutorial to help you dream up an interesting example and let me know about it. I'll post URLs
for those you send me.
You can download the application and completed project
if you don't feel like working through the tutorial. See you next week!
9-06-01
Create a Stock Ticker with REALbasic (Part 2) by Erick Tejkowsi
Last week, we started building a stock ticker application. In that tutorial
we looked at one way to retrieve stock information from the Internet with REALbasic. This week, we'll discuss how to
display and animate the stock information. The animation will mimic a "Times Square style" stock sign.
Preparation
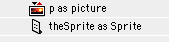
If you are following along from last week, open the Stock Ticker project and create two new Window1 properties: a Sprite and a Picture.
To create these properties, open the Window1 Code Editor and select Edit->New Property.
Build the Interface
Since this is Part 2 of the tutorial, much of the interface is already built. This week, we'll continue using the interface from
last week, adding the following three controls:
| Control |
Settings |
| SpriteSurface |
Name : SpriteSurface1
Height=40 |
| Timer |
Name : AnimationTimer
Period = 100
Mode = 0 |
| PushButton |
Name : StopButton |
Arrange the interface however you wish. To give you some ideas, here's how the demo interface is arranged:
Add the Code
Before adding any code to the new controls, we will begin by appending some code to a control from last week. Scroll to the end of the
DLfinished event of httpSocket1 (after all existing code) and add the following code:
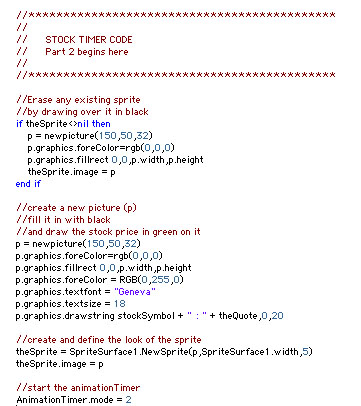
To help you understand what's going on here, we'll look at this code in reverse order. The AnimationTimer periodically
refreshes the stock animation. So, we simple turn it on here.
The heart of our animation is the SpriteSurface control. It takes care of running our animation and we have to do
amazingly little work to make it do so. To animate with a SpriteSurface, you must first create a Sprite object, passing it a
picture (named "p"). Thus, before creating a Sprite, we create a Picture object and draw the stock quote on it.
Since we want this code to execute anytime we request a new stock quote and a stock animation may already be running, we start this code off
by clearing out any existing Sprite graphic with a black square. So, to recap in the forward order, we erase any existing sprites, create a new picture,
draw the stock information on that picture, and create a sprite using the picture. Finally, we start the animation timer.
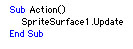
Navigate to the Action event of AnimationTimer and enter this code:
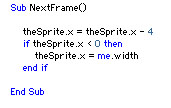
This lonely line of code forces SpriteSurface1 to redraw its sprites. When you call the Update method of a SpriteSurface, it
causes the NextFrame event of the SpriteSurface to execute. That's where we move the Sprite.
Of course, if it falls off the edge, we want to bring it back to the
opposite side to start the crawl all over again.
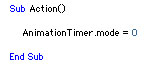
Once the animation is running for awhile, you may want to turn it off. Open the Action event of StopButton and add some code to stop
the animation process.
Conclusion
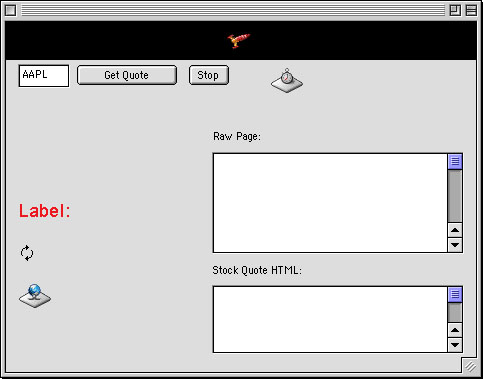
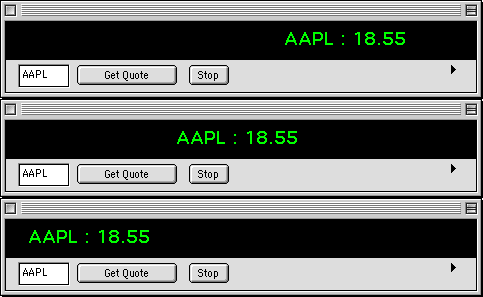
To give you a taste for how the finished product should look, here's a screenshot. Following last week's recommendation,
this graphic shows the interface shrunken to conceal the editfields where all the parsing takes place.
Test the project and when you're happy with the results, build the final application.
You can download the application and completed project
if you don't feel like working through the tutorial. See you next week!
|


 Boot Panels