 |
 |
 |
||||
 3D 3D Photo Gallery (Part 1) 3D Photo Gallery (Part 2) Audio Poor Man's MIDI Make A Metronome iPod Tricks (Part 1) iPod Tricks (Part 2) iPod Tricks (Part 3) Laugh Track Machine Audio Player with Reverb Shepard Melody RB Phone Home Build a Drum Machine Custom Controls and Windows Double Click Listbox Draggable Metal Window Double Click Canvas Custom Buttons Custom Buttons Part II iTunes-style Listboxes Custom Controls General RB Scrolling Windows Using Mesage Dialogs Case-Sensitive Word Finder Introduction to Stacks Wiggle Window JPEG in PDF Listbox Checkboxes Background Applications Listbox Auto-Find Virtual Volumes Time Tracker Software Distribution (Part 1) Software Distribution (Part 2) Software Distribution (Part 3) Software Distribution (Part 4) Exceptions Tips and Tricks Text Clippings Made Easy Graphics Drawing a Simple Gradient The SpriteSurface: Space Game Image Spinner Cropping Graphics (Part 1) Cropping Graphics (Part 2) Cropping Graphics (Part 3) Cropping Graphics (Part 4) Shimmer Graphics Lissajous Figures Simple Screen Capture Vector Graphics Kaleidoscope Images Stegonography Spirals! Image Table RB Magnifying Lens Screen Capture Color Picker Tutorial Hacks Ghost Grab Speedy Mouse Extension iTunes Plugins iTunes Skinner Mac OS X Global Hot Key Event (Carbon Events) Login Welcomer (Carbon Events) Add/Remove Buttons Resizable Sheets Mac OS X Preferences Window Using Sheets in REALbasic Build a Bundle (Part 1) Build a Bundle (Part 2) Dock Your Passwords Mac OS X Debugging REALbasic Mac OS X Icon Tutorial Animate Your Dock RB and the Command Line Menus Window Menu Templates Menu Listbox Menu Novelty Guessing Game Calendar Trivia Tile Mixer Zip Code Finder Happy Valentine's Day Merlin Simulator (Part 1) Merlin Simulator (Part 2) Merlin Simulator (Part 3) Buzzword Machine AppleSoft BASIC Printing Print to PDF Registration Registration Code Validation Network Registration Codes Resources Picture Extractor (Part 1) Picture Extractor (Part 2) Serial Caller ID (Part 1) Caller ID (Part 2) Caller ID (Part 3) Speech Speech Recognition Socket Communication Easy Peer-to-Peer File Sharing MacPAD Version Checking Display Web Image In Canvas HTML IMG Tags Version Tracking Even Smarter Instant Messaging Web Tiler JavaScript and REALbasic Stock Ticker (Part I) Stock Ticker (Part 2) AIM Mate XML Manipulation Simple XML Introduction Video Big Brother Video Capture Note: All articles without a byline were written by Erick Tejkowski. When cleaning the site I removed them because the code differed from page to page, and I have yet to put them back in.
Tell us about a bad link. |
 |
The SpriteSurface control is a fairly power animation system for two-dimensional (2d) graphics. Although it may not be king of the mountain for any and every 2d game, it certainly deserves a good look as it can accomplish a lot if used cleverly.
The SpriteSurface class in REALbasic is a RectControl subclass which must be embedded in a window. In REALbasic 2.x and earlier, the SpriteSurface was a bit different and would essentially create it's own window, but in 3.0, it behaves in the same manner as any other RectControl such as a PushButton or canvas. The objects which move around inside of our SpriteSurface, our sprites, are implemented through the Sprite class. Sprites are attached to a SpriteSurface and thereafter are involved in any collisions that happen in and all drawing that the SpriteSurface does.
If you run the project and select Run from the File menu, you should see absolutely nothing happen. If you wait, your cursor may turn into a spinning beachball or watch, but that's it. The black still stays black, but that black is being drawn by a sprite surface! Pretty cool huh? No. It's not. So lets make it cool.
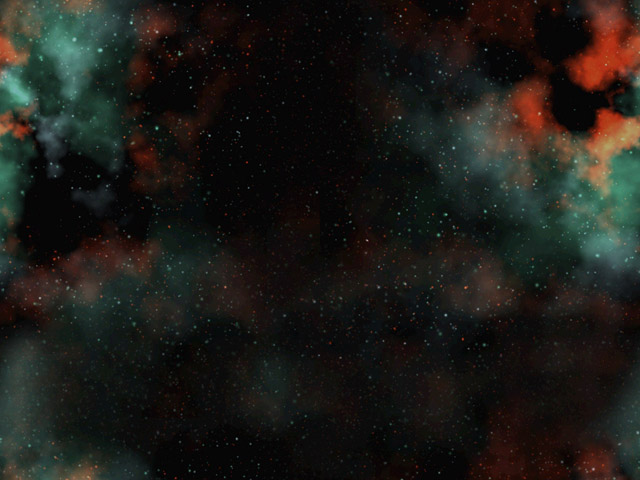
Next, set the the Background property of the spritesurface in the Properties Window to the "Space" image. The background is exactly as you'd expect. It's the background of whatever is drawn to the spritesurface. Anything drawn in the surface including sprites will always appear in front of the background. SpriteSurfaces Part II
In the next "n" tutorials, we're going to be creating a very basic Space Invaders-like game in order to introduce you to the ideas of sprite animation. First, download the project I've written. It's a completed project with all of the necessary images included, so you can build it right out of the box if you want.
The first thing every animation needs is a loop which drives the animation. In the last tutorial I breifly covered the Run method, but in this tutorial we're going to make our own. Out of all of the things I'll do in this tutorial which are against "good" design (good being whatever I think it is ;^) I'm going to actually use this one. Instead of using the Run method, I always make my own variation which looks similar to this:
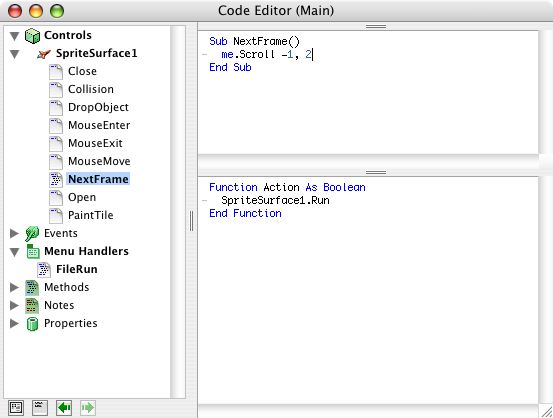
Now the above code is really no different than the Run method with the surface's FrameSpeed property set to 2; It calculates the minimum time which should pass between updates (frameTime) and then enters a loop which updates the sprite surface only when the time has passed. It's not this code, but variations of it will have its advantages. In our project, we're going to write all of the "game" code in the NextFrame event, the event that is called before a frame is drawn. In other projects, the task of updating the objects in the world are/may be separated from the event of a frame drawing. The purpose of this would be to set a priority for whether the objects in the world should update or whether they should be drawn. In a physics simulation which is being recorded to disk, the updating of the objects is more critical than actually seeing the objects. However in a speed-critical situation, you could give more time to drawing. How much time to give to what depends on what you're doing and warrants at topic on its own, but for the most part, a 1:1 update ratio should work out fine. You may have noticed the gDone variable used in the code above which is a boolean property of the window that the sprite surface Surface is in. The game's animation will run as long as this property is false, thus in order to stop the game, we set it to true which is done with our StopGame method:
Creating the Player The other critical part of an animation is having something to animate. In Main window, there is a property "PlayerShip as Sprite". Recall from the previous article that the Sprite property is the base class representing an object which is being animated. REALbasic Sprites have a few properties. The have an Image, X and Y positions, Group, and Priority. The Image property is the current image of the sprite and X and Y make up the position in the surface at which the sprite's image is being drawn. The Priority values of sprites determine what order the sprites are drawn in on each frame. A lower Priority value (closer to 0) means that the sprite is drawn before (and thus under or behind) other sprites. The Group value determines whether and who the sprite collides with. Only sprites with different Group values will collide and cause the Collision event to fire with the exception of sprites with a Group value of 0. If the value is 0, then the sprite cannot collide with any other sprite. We will use the group property in a later tutorial.
In the Open event of the sprite surface named Surface, we create a new sprite for PlayerShip and assign it an image, group, and position (priority doesn't matter to us). Since a sprite must have at least one image but does not have to have more, there is only a single Image property in the Sprite class. In our project however, we want the space ship's image to change depending on the direction it is moving. To accomplish this, we begin by setting the image the ship's stationary image, and when the player presses a key to move left or right, we will change the Image property's value and change it back if no key is held down. The last step when creating a sprite is to attach it to the sprite surface it will be used in by using the surface's Attach method. What this does is let the surface know that the given sprite should be drawn in the surface. If you don't attach a sprite to a surface, you'll never seen it drawn.
To move the sprites attached to a surface, we move them in the NextFrame event. (The code which does this for our Space Invaders clone is already in the NextFrame event in the downloadable project. It's also below, but the order in which it's given is different than the order in the project. It's differen below for the purposes of explaination.) One of the first things you should account for when writing a game, is making a way to stop it. To do this you pretty much will always need to determine if the user is doing something (holding down a key or the mouse button) unless you want to set a time limit or simply have the user unplug their computer when they want the game to stop. To determine whether the user is holding down a certain key or not, we use the SpriteSurface class' KeyTest() method. The KeyTest() method accepts a single parameter, a number representing the key code for the key, and returns a boolean variable which is true if the key is currently being held down. Key codes for keys are NOT the ASCII value. Instead it is a number unique to the key's position on the keyboard. The reason that the KeyTest() method asks for a KeyCode rather than ASCII value is so that the '1' in the number pad will have a different key code than the '1' above the 'Q'. To stop the game in this project, we will test for the Escape key being held down and if it is, we'll call the StopGame method which will then set gDone to false which will make the animation loop in RunGame end.
As you can see, the key code for the Escape key is 53, or 35 in hexadecimal. The key code values for all of the keys on the QWERTY and DVORAK keyboards can be found in the User Guide at the end of the "Work with Text and Graphics" section. Other instances in which we want to test for keys being pressed is the player pressing the right and left arrow keys to move the ship right and left.
Above, we test for the key codes &h7B and &h7C which lets us know if the left and right arrow keys are being held down respectively. In either case we move the ship a specified amount of pixels (kShipSpeed) to the right or left, and then check to make sure that the ship is within the boundaries of the surface. If the ship goes outside of the surface, we move it back inside. The last line of code in either case sets the image of the PlayerShip sprite to the the left-banking or right-banking ship image. In the case that neither key is being held down, we set the image to the stationary PicShipCenter image so that the ship does not appear to be moving. So now we have a ship, moving left and right in our sprite surface. It's not much, but we're pretty close to getting the basics of a game implemented. All that is left is to add bullets which are fired from the ship (see if you can do it! Most of what you need to know is already done in the project) and finally making obstacles appear in the way of the player which (s)he must shoot. SpriteSurfaces Part III
The last two pieces of our Space Invaders-like game is to make our ship fire and have enemy ships come down from the top of the window and the two are remarkably similar. At the moment we have our space background in place and we have a working spritesurface which shows our player's space ship which we can move using the arrow keys. The completed game is only about 100 lines of code and we're well on our way there, so lets get started. The first thing you should do is resize the window and sprite surface to be 540 x 600 or something where the window is narrower than it is tall. The standard 640 x 480 works, but it's too wide and stubby for my taste. Okay, so bullets... The general concept behind projectiles is, you test for a certain key being pressed (we'll use the spacebar) and you fire a projectile, a bullet. (Obviously!) However, there are two things you need to consider before firing. 1) Do I have a bullet to shoot? 2) Am I able to shoot, or is it too soon after my last shot? The first consideration is really your prerogative. Many shoot 'em up games have unlimited ammo so it's nothing but pure non-stop bloody mahem for the player. Generally, you want to give the player enough ammo so they don't have to be a sniper to pass a level, but you want to limit what they have so they can't simply beat the game by holding down the fire key all the time. The second consideration is critical. If your game is running at 60 frames per second and on each frame you test for the fire key being pressed, you'd be sending bullets out every 60th of a second unless you limit the rate of fire. Machine guns don't even fire that fast! After you've established that a bullet can be fired it's put into its initial position (right at the end of the barrel, or simply infront of the ship in our case), then on each passing frame, the bullet is moved a certain amount of pixels in the direction of where the gun was pointed; up, in our case. After the bullet is moved in each frame, you should also test whether the bullet is still in the visible area. If the bullet is outside of the visible area, then there's no point in using it any longer so we remove it from the spritesurface using the Sprite.Close method. Enemy ships, work in a very similar fasion. Instead of the ships being triggered by a key being pressed, ships are triggered by time. What we do is set a random time in the future which a ship will be sent towards the player. After the ship is sent, we set the random time for which the next ship will be sent. Similar to the bullets, we want to 1) test for the ship trigger rate (don't want them coming at us in too big of swarms!), 2) update the ships' positions on each frame, and 3) check to make sure that the ship is still visible and if it isn't, destroy it. Checking for collisions between a bullet and an enemy ship is easily done. Recall that in the previous tutorial we said that the Group value determines whether a sprite collides with other sprites, and who the sprite collides with. Remember that only sprites with different Group values will collide and cause the Collision event to fire and that the Group values must not be 0 for the sprites to collide. In our game, we will set the bullets' Group values to 2 and the enemy ships' Group values to 3. This way whenever a bullet and an enemy ship collide the Collision event of the sprite surface is fired. When a collision occurs, we will remove both of the sprites from the sprite surface (again, using the Close event) and beep so that we know they hit. That's all there is to it! It's simple enough once you've done it, so let's get to it. Hooah!
kShipSpeed: the speed the player's ship moves side to side (pixels per frame). Next we're going to need four new window properties:
The Bullets() and Enemies() arrays hold sprites which represent the bullets and enemy ships currently in the sprite surface. LastBulletFired is the time that the last bullet was fired by the player, and NextEnemyTime is the random time in the future that specifies when the next ship will be shown. The chunk of code below tests for the spacebar being held down and executes if it is true. The nested if statment checks to see that the maximum number of bullets have not been fired, and that the minimum time has passed since the last shot. The code inside the if statement creates a new sprite for the bullet, gives it the bullet image, centers it just above the player's ship, adds it to the Bullets() array so we can keep track of it in each frame, attaches it to the sprite surface, and then sets the time the bullet was fired.
Moving bullets is pretty simple. The code below loops through the Bullets() array (which contains Sprites for all of the bullets that have been fired and are currently in the sprite surface) and moves them up towards the top of the surface. It then tests whether the y value of the bullet sprite is less than or equal to 0 minus the bullets height. When it is, this means that the bullet is enough outside of the top of the sprite surface that it can't be seen and thus should be removed from the sprite surface and the Bullets() array which is what the next two lines of code do. Removing the bullet from the array lets us "reclaim" the bullet so the player can fire another bullet.
Moving enemies, as I said, is very similar to moving the bullets. Instead of checking for the enemy ship to be outside of the top of the surface, we check to see whether the ship's y value is greater than or equal to the height of the surface meaning it is below the surface and can't be seen. The code to move the enemy ships is in the for loop at the bottom of the code chunk below.
Within the if statement above the for loop lies the code which creates enemy ships. The conditional in the if statement checks to see if the maximum number of ships is not currently on the screen and that the time that the next enemy ship should be released has come. In the case that both are true, an enemy ship is created, its group is set to 3 (so that it collides with Group 2 which is our bullets), it is positioned above the top of the surface so that it comes into the surface instead of magically appearing in it, places it at a random x location between 0 and the width of the surface - the width of the ship (that way it does appear half or more off the right side of the surface), attaches it to the surface, adds it to the Enemies array and then creates a time for the next ship to be released. The last lines of code to be written handle the collision between a bullet and an enemy ship. The Collision event has two parameters, s1 and s2 which are both sprites. The tricky thing about the Collision event is that you don't know what sprite s1 or s2 are. In our case s1 could be the bullet and s2 could be the ship, or s1 could be the ship and s2 could be the bullet. We don't know how it will turn out to be, so what we do is test to see how it is. In this case, we can test the sprites' Group property values. If it is a 3, then it is an enemy ship. If it is a 2, it is a bullet. What we do for both ships and and bullets is exactly the same, we remove it from the array its in and we remove it from the sprite surface. It's that simple.
If you've made it this far, congratulations. Sprite animation is simple but only once you understand it, and understanding it really takes a lot of fiddling. That's how I figured it out. Yep. Aaaaaall by myself. No help at all.... yup... All those times I asked the mailing list those questions, I was just confirming what I suspected... yeah... that's it. I wasn't asking them how to do anything. :^) |

|
|||
|
Please support ResExcellence by Visiting our Sponsors. One click makes a difference. |
||||||
 |
 |
 |






 |