 |
 |
 |
||||
 3D 3D Photo Gallery (Part 1) 3D Photo Gallery (Part 2) Audio Poor Man's MIDI Make A Metronome iPod Tricks (Part 1) iPod Tricks (Part 2) iPod Tricks (Part 3) Laugh Track Machine Audio Player with Reverb Shepard Melody RB Phone Home Build a Drum Machine Custom Controls and Windows Double Click Listbox Draggable Metal Window Double Click Canvas Custom Buttons Custom Buttons Part II iTunes-style Listboxes Custom Controls General RB Scrolling Windows Using Mesage Dialogs Case-Sensitive Word Finder Introduction to Stacks Wiggle Window JPEG in PDF Listbox Checkboxes Background Applications Listbox Auto-Find Virtual Volumes Time Tracker Software Distribution (Part 1) Software Distribution (Part 2) Software Distribution (Part 3) Software Distribution (Part 4) Exceptions Tips and Tricks Text Clippings Made Easy Graphics Drawing a Simple Gradient The SpriteSurface: Space Game Image Spinner Cropping Graphics (Part 1) Cropping Graphics (Part 2) Cropping Graphics (Part 3) Cropping Graphics (Part 4) Shimmer Graphics Lissajous Figures Simple Screen Capture Vector Graphics Kaleidoscope Images Stegonography Spirals! Image Table RB Magnifying Lens Screen Capture Color Picker Tutorial Hacks Ghost Grab Speedy Mouse Extension iTunes Plugins iTunes Skinner Mac OS X Global Hot Key Event (Carbon Events) Login Welcomer (Carbon Events) Add/Remove Buttons Resizable Sheets Mac OS X Preferences Window Using Sheets in REALbasic Build a Bundle (Part 1) Build a Bundle (Part 2) Dock Your Passwords Mac OS X Debugging REALbasic Mac OS X Icon Tutorial Animate Your Dock RB and the Command Line Menus Window Menu Templates Menu Listbox Menu Novelty Guessing Game Calendar Trivia Tile Mixer Zip Code Finder Happy Valentine's Day Merlin Simulator (Part 1) Merlin Simulator (Part 2) Merlin Simulator (Part 3) Buzzword Machine AppleSoft BASIC Printing Print to PDF Registration Registration Code Validation Network Registration Codes Resources Picture Extractor (Part 1) Picture Extractor (Part 2) Serial Caller ID (Part 1) Caller ID (Part 2) Caller ID (Part 3) Speech Speech Recognition Socket Communication Easy Peer-to-Peer File Sharing MacPAD Version Checking Display Web Image In Canvas HTML IMG Tags Version Tracking Even Smarter Instant Messaging Web Tiler JavaScript and REALbasic Stock Ticker (Part I) Stock Ticker (Part 2) AIM Mate XML Manipulation Simple XML Introduction Video Big Brother Video Capture Note: All articles without a byline were written by Erick Tejkowski. When cleaning the site I removed them because the code differed from page to page, and I have yet to put them back in.
Tell us about a bad link. |
 |
This week, we continue with the second part of a two part tutorial to create a 3D Photo Gallery with REALbasic. The end result will allow you to "walk" through an imaginary room and view a collection of photographs hanging on the imaginary walls. Addendum. If you plan on using this project with Mac OS X, you first need to download and install Quesa from www.quesa.org. Build the Interface Last week we prepared the graphics and 3D objects for this project. This week, we'll put them to use. To begin, launch REALbasic and add the photographs you made last week to the project window. It's usually a good idea to save often while programming, so go ahead and save the project. Next, drag the 3D objects you created last week into the same folder as your REALbasic project. If you don't know how to create 3D objects, you can download a few examples with the completed project at the end of this tutorial. Next, open Window1 and add a PushButton, StaticText, and RB3DSpace controls to the window. Whatever dimensions you set for the RB3DSpace control will dictate how large your "world view" is. As an example, your interface might look like this: 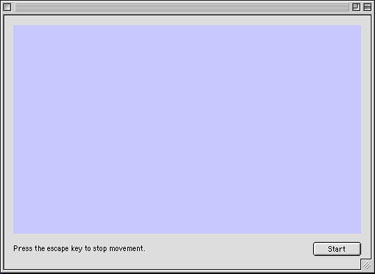 Believe it or not, that's all there is to the interface. On to the more complex aspect of this project... the code. Add the Code The code for this 3D tutorial is more intricate and lengthy than usual. In the interest of brevity, we will discuss some of the key concepts and look at a few code snippets from the project. It is left up to the reader to download the completed project to see the code in its entirety. To set up a 3D world in REALbasic, follow this simple process:
Navigate to the Open event of RB3DSpace1 and add the following code to load the 3D objects: LoadTheObjectsLoadTheObjects is a method to, you guessed it, load the objects. To start with, the LoadTheObjects method loads a background object, in this case a sphere. As you move around inside this 3D "world", you will be placed inside this sphere. // create the backgroundRb3DSpace1.background = LoadAnObject("BackgroundOrb.3DMF") Next, we load a chair object from a 3DMF file. When you load an object, you may position it anywhere within the 3D world. Since we are dealing with 3 dimensions, object can move on the x-axis (left/right), the y-axis (up/down), and the z-axis (into your computer monitor). Not only can you position an object in 3 dimensions, you can also rotate one in 3 dimensions. The technical terms for 3D rotations are roll, pitch, and yaw and they are expressed in radians. If you would like to learn more about them, be sure to take a look at the Object 3D Class in REALbasic's Language Reference (press Cmd-1). Once you've loaded and defined a 3D object, you add it to the mix by calling the Append method of the RB3DSpace control. // create a chair objectobj = LoadAnObject("simplechair.3DMF") obj.position.z = 100.0 obj.position.y = 10.0 obj.Yaw PI Rb3DSpace1.objects.Append obj While some objects are loaded directly into REALbasic, others can be created on the fly using 2D pictures. This is where the photo gallery aspect of our tutorial comes into play. To create a 3D object from a 2D image, first create a new Object3D. Then, create a picture object and draw your image and its mask on it. Next, add the picture and mask to the Object3D with the AddShapePictureWithMask method. Like before, you may also position and rotate the object before appending it to the RB3DSpace. //create photograph object from face1obj = New Object3D p = NewPicture(100,100,32) p.graphics.drawpicture face1,0,0 p.mask.graphics.drawPicture theMask,0,0 obj.AddShapePictureWithMask p, p.mask, 1.0 obj.position.z = 250.0 obj.position.y = 50.0 obj.position.x = 0.0 obj.Yaw PI Rb3DSpace1.objects.Append obj You may continue adding as many objects to the mix as you wish. The demo project loads almost a dozen, so you can investigate the code to see what other surprises are in store. With all the objects created and ready to go, we enter a loop. We will start this loop from the Action event of PushButton1. Normally we would never loop in the fashion we will here. 3D graphics are processor intensive, so we want to devote all of our computer's attention to the task at hand: drawing 3D and responding to our actions. To help things along, we first include two pragma statements that temporarily halt CPU tasks that occur while your application is running. Then, we finally enter the loop. With each pass of the loop, we check to see if any keys were pressed and refresh the display accordingly. At the bottom of the loop, we check for a press of the "escape" key, which we will use to stop the animation. #pragma DisableBackgroundtasks#pragma DisableBoundsChecking me.enabled=false do CheckTheControls Rb3DSpace1.Refresh loop until Keyboard.AsyncKeyDown(&h35) // the escape key me.enabled=true Just so you can test out the project without looking at any code first, the keys that we respond to are:
The finished project will look like this: 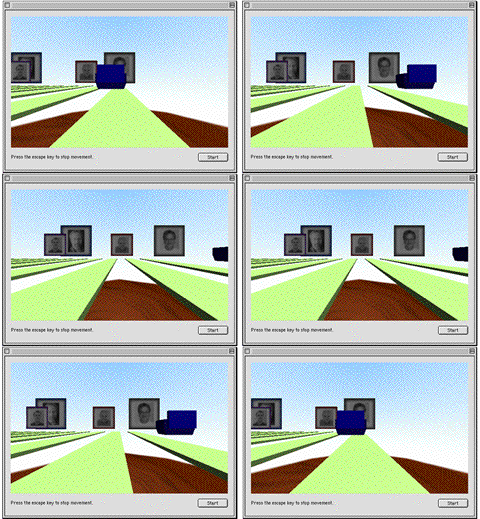
Conclusion Well, that's it for this week. You can download the completed project, 3D models, and ResEx graphics here. See you next week! |

|
|||
|
Please support ResExcellence by Visiting our Sponsors. One click makes a difference. |
||||||
 |
 |
 |





 |