By now, you probably know that PDF is a very important part of Mac OS X. It can create and display PDF without any extra software. Did you know that you can create your own PDF documents using standard REALbasic code? If not, join us today as we take a look at how to do it.
Build the Interface
Today's example project is very simple to build. All you'll need is one PushButton. Launch REALbasic and add one PushButton to Window1. Resize the window to your preferences. My example interface looks like this:
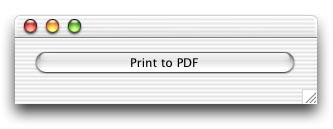
That's it! That wasn't so tough, now was it?
Add the Code
The code for this project is also very easy to complete. In fact, you don't have to type one bit of code if that's your preference. Double click the PushButton in Window1. Then, press Cmd-1 (one) to open the Language Reference. Navigate to the Printersetup class. Once you find it, scroll down to the bottom of its documentation. The third snippet of code in the Exmamples section is what you need.
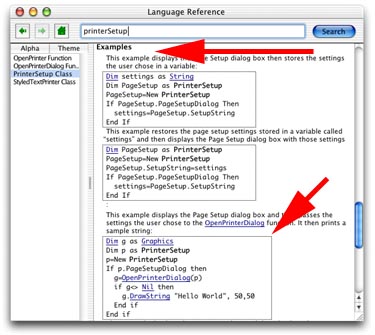
As you can see, the code is outlined with a square. Drag that square to the Action event of the PushButton in the Code Editor.
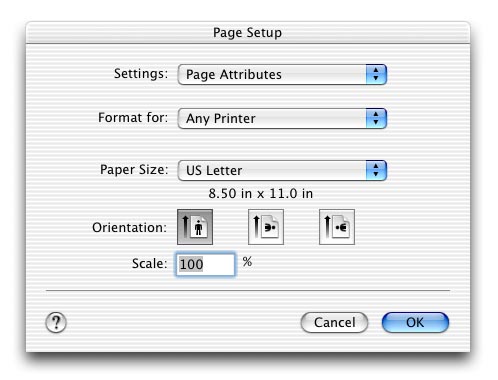
That's all there is! To test your code, select the Debug-Run menu. Click the PushButton. You'll immediately see a Page Setup dialog. Adjust it to you liking and click OK.
Next, you'll see the standard Print dialog. Notice the "Save as PDF" button at the bottom of this window. That's the one you want to click.

When you click the "Save as PDF" button, you'll see the standard Save dialog. The new document that you "print" can be opened with your favorite PDF viewer like Preview or Adobe Acrobat.
Conclusion
If you don't feel like recreating this project, you can download it here. See you next week!