Mac OS X 10.2 added a new command line tool called screencapture. This handy command lets you take screenshots in all sorts of ways. The problem? There are so many options that it begins to become difficult to remember what everything does. REALbasic comes to the rescue! Today we'll build a simple 5-minute project that lets you add an interface to this powerful new command line tool.
Build the Interface
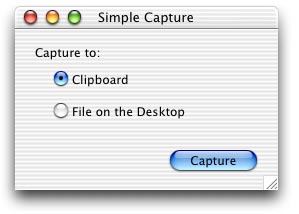
The interface this week is really simple to create: one PushButton and two RadioButtons. When you add them to a window, leave their default names as is. (i.e. PushButton1, RadioButton1, and RadioButton2).
Arrange the interface any way you want. Mine looks like this:
Source Code
Like the interface, the code this week is also simple. Double-click PushButton1 and add the following code to its Action event:
Dim s As Shell
dim d as date
dim f as string
//NOTE: Mac OS X 10.2 or higher required
s=New Shell
If TargetCarbon then
if radioButton1.value then
//capture to the clipboard
s.execute "screencapture -c"
else
//capture to a file
d=new date
f = str(d.totalSeconds)+".pdf"
s.execute "screencapture ~/Desktop/" + f
end if
If s.errorCode<>0 then
MsgBox "Error Code: "+Str(s.errorCode)
end if
end if
Keep in mind that this project only covers a few options available to you with the new screencapture command. To learn about the other features, use the man command:
man screencapture
With just a little effort, it wouldn't be too tough to add the rest of the options.
Conclusion
That's it for this week. Select Debug->Run to test your work. As usual, you can download the finished project. See you next week!