This week, we continue with the second part of a two part tutorial to create a 3D Photo Gallery with REALbasic. The end result will allow you to "walk" through an imaginary room and view a collection of photographs hanging on the imaginary walls.
Addendum. If you plan on using this project with Mac OS X, you first need to download and install Quesa from www.quesa.org.
Build the Interface
Last week we prepared the graphics and 3D objects for this project. This week, we'll put them to use. To begin, launch REALbasic and add the photographs you made last week to the project window. It's usually a good idea to save often while programming, so go ahead and save the project. Next, drag the 3D objects you created last week into the same folder as your REALbasic project. If you don't know how to create 3D objects, you can download a few examples with the completed project at the end of this tutorial.
Next, open Window1 and add a PushButton, StaticText, and RB3DSpace controls to the window. Whatever dimensions you set for the RB3DSpace control will dictate how large your "world view" is. As an example, your interface might look like this:
Believe it or not, that's all there is to the interface. On to the more complex aspect of this project... the code.
Add the Code
The code for this 3D tutorial is more intricate and lengthy than usual. In the interest of brevity, we will discuss some of the key concepts and look at a few code snippets from the project. It is left up to the reader to download the completed project to see the code in its entirety.
To set up a 3D world in REALbasic, follow this simple process:
Navigate to the Open event of RB3DSpace1 and add the following code to load the 3D objects:
LoadTheObjectsLoadTheObjects is a method to, you guessed it, load the objects. To start with, the LoadTheObjects method loads a background object, in this case a sphere. As you move around inside this 3D "world", you will be placed inside this sphere.
// create the backgroundNext, we load a chair object from a 3DMF file. When you load an object, you may position it anywhere within the 3D world. Since we are dealing with 3 dimensions, object can move on the x-axis (left/right), the y-axis (up/down), and the z-axis (into your computer monitor). Not only can you position an object in 3 dimensions, you can also rotate one in 3 dimensions. The technical terms for 3D rotations are roll, pitch, and yaw and they are expressed in radians. If you would like to learn more about them, be sure to take a look at the Object 3D Class in REALbasic's Language Reference (press Cmd-1). Once you've loaded and defined a 3D object, you add it to the mix by calling the Append method of the RB3DSpace control.
// create a chair objectWhile some objects are loaded directly into REALbasic, others can be created on the fly using 2D pictures. This is where the photo gallery aspect of our tutorial comes into play. To create a 3D object from a 2D image, first create a new Object3D. Then, create a picture object and draw your image and its mask on it. Next, add the picture and mask to the Object3D with the AddShapePictureWithMask method. Like before, you may also position and rotate the object before appending it to the RB3DSpace.
//create photograph object from face1You may continue adding as many objects to the mix as you wish. The demo project loads almost a dozen, so you can investigate the code to see what other surprises are in store.
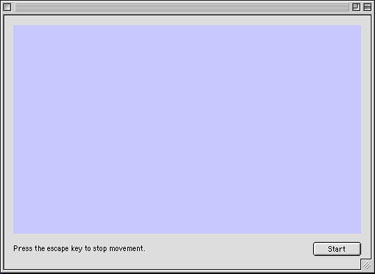
With all the objects created and ready to go, we enter a loop. We will start this loop from the Action event of PushButton1. Normally we would never loop in the fashion we will here. 3D graphics are processor intensive, so we want to devote all of our computer's attention to the task at hand: drawing 3D and responding to our actions. To help things along, we first include two pragma statements that temporarily halt CPU tasks that occur while your application is running. Then, we finally enter the loop. With each pass of the loop, we check to see if any keys were pressed and refresh the display accordingly. At the bottom of the loop, we check for a press of the "escape" key, which we will use to stop the animation.
#pragma DisableBackgroundtasksJust so you can test out the project without looking at any code first, the keys that we respond to are:
The finished project will look like this:
Conclusion
Well, that's it for this week. You can download the completed project, 3D models, and ResEx graphics here. See you next week!