This week, we begin Part 1 of a two part tutorial to create a 3D Photo Gallery with REALbasic. The end result will allow you to "walk" through an imaginary room and view a collection of photographs hanging on the imaginary walls.
Background
We are not going to concern ourselves with code this week. Instead, we will go through the steps to prepare the graphics and 3D components for next week.
Photos First
Since the main idea behind this tutorial is to create a photo gallery, it would make sense that we will need a set of photos. For the online example, we will be using photos of the beloved ResEx crew, but feel free to use which photographs you wish.
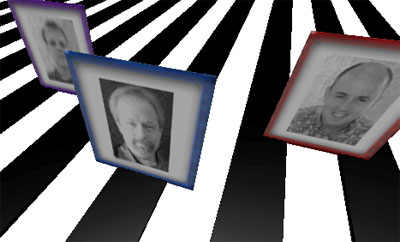
To make your life easier, resize the photos to identical sizes. For example, our ResEx photographs have been resized to a dimension of 100x100 pixels. Just to add a little pizazz, I also created a "frame" for each picture. When we add these photos to the project, they will instantly gain 3D properties. Just to give you an idea of how the images will be displayed, the final 3D product will something like this:
3D Models
In addition to photographs, we can also display 3D models in our scene. There are countless free models on the web. For our example, we want to use models in the 3DMF format. Some places where you can find great 3D tools and models:
The only 3D model that we will require is a floor tile. It is simple to create one of these models with Mesh (listed above). Simply create a cube with the following dimensions (x=50; y=5; z=50). This tutorial is not meant as a primer to 3D app use, so if this demand is over your head, you'll be able to download a floor tile next week with the demo project. If you are a 3D whiz, feel free to put together some props for the photo gallery. We'll look at how to add them to the gallery project next week.
Conclusion
Well, that's it for this week. Gather your photo gallery components and come prepared for 3D magic next week. 3D programming has never been easier than with REALbasic. You'll be able to perform amazing feats with barely any code, so don't miss it. See you next week!